Sometimes you don't want to spin up a Node.js project or write a Python script just to grab a single screenshot. You need a quick capture from the terminal: test an API parameter, check an edge case, take a before/after shot. Or maybe you're SSHed into a server and cURL is all you've got.
I use cURL all the time when debugging ScreenshotRun. Testing a parameter here, poking at some edge case there, or just grabbing a quick screenshot of a page that broke overnight. Below are the commands that live in my shell history — every one is a single cURL call you can copy, swap in your API key, and run. I'll cover basic capture, full-page, mobile viewport, dark mode, PDF, thumbnails, CSS injection, hiding cookie banners, and rendering raw HTML. Each command can be saved as a shell alias or dropped into a bash screenshot script.
Getting your API key set up
First, create a free account. The free plan gives you 200 screenshots per month. Once you're in, go to Dashboard, then API Keys, and create a new key.
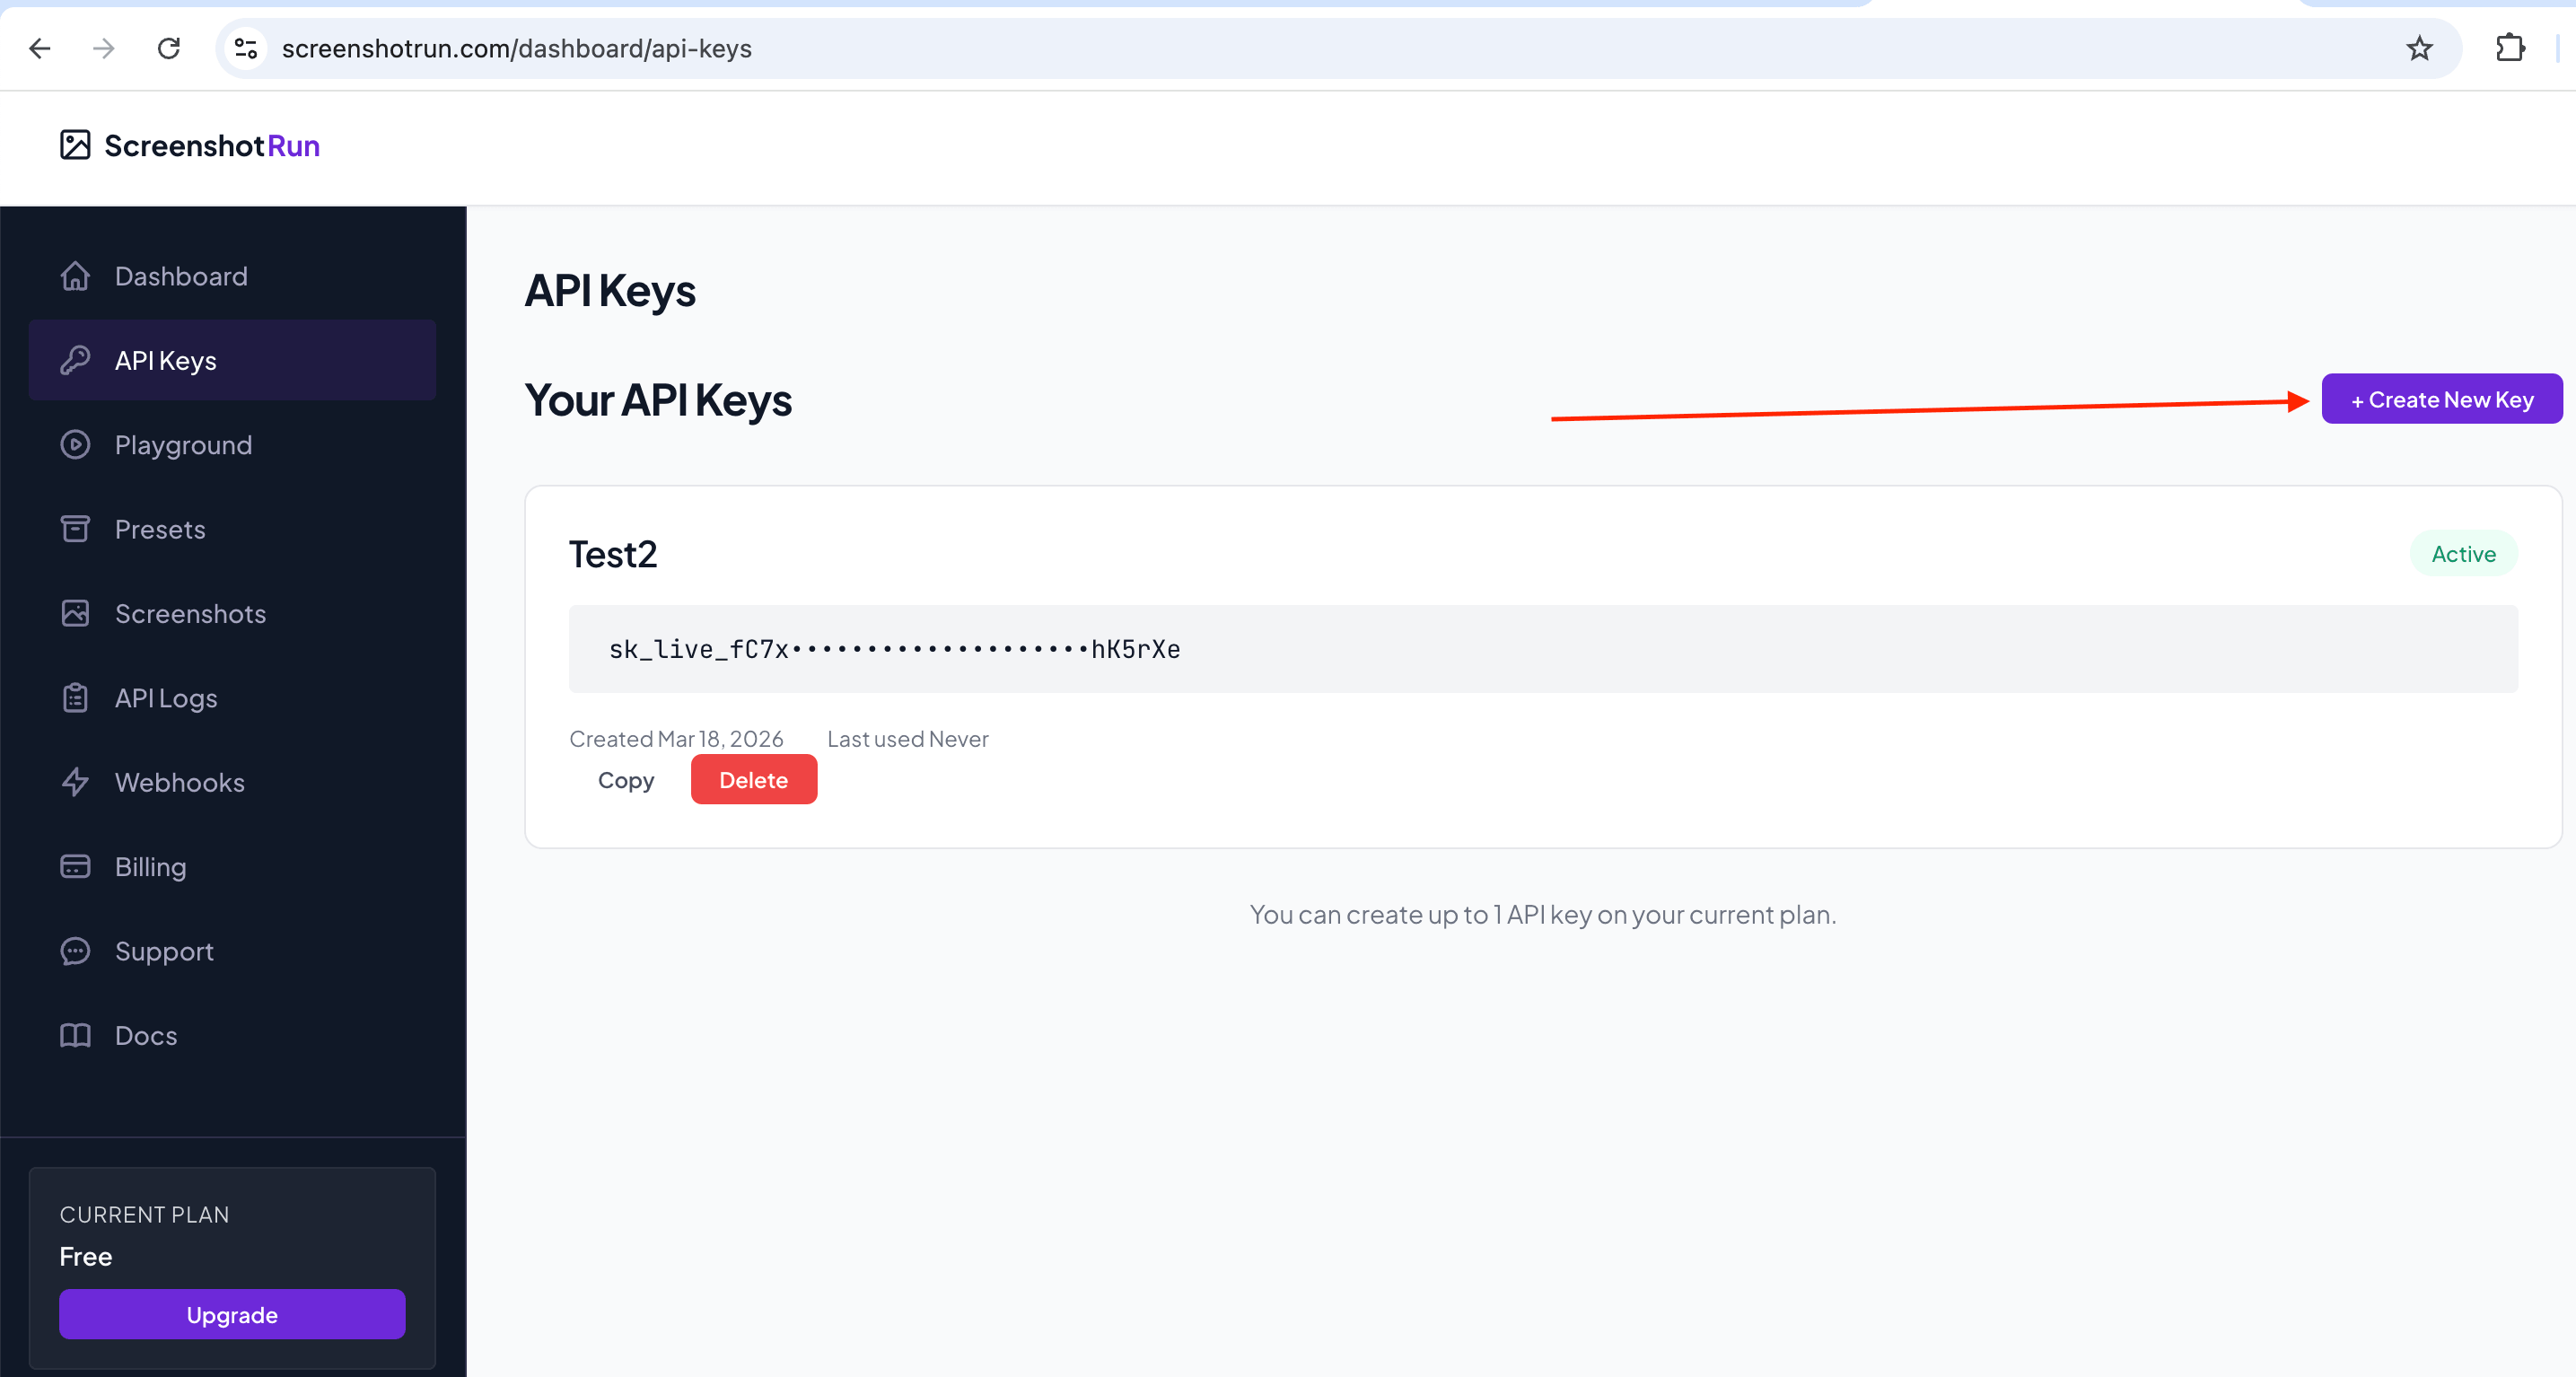
Your key looks something like sk_live_aBcDeFgHiJkLmNoPqRsTuVwXyZ0123456789ab. Export it as an environment variable so it stays out of your shell history:
export SCREENSHOTRUN_KEY="sk_live_your_key_here"Every example below uses $SCREENSHOTRUN_KEY instead of the raw token. Cleaner, and one fewer secret floating around in your terminal scrollback. For the complete parameter reference and GET endpoint examples, check the cURL integration guide.
Set up a working directory
Quick housekeeping before we start. Create a dedicated folder so all your test screenshots land in one place instead of scattered across your home directory:
mkdir -p ~/screenshots-bash && cd ~/screenshots-bashEvery command below saves files to the current directory, so everything stays together. Sounds trivial, but after the third time hunting for a screenshot that landed in /root because I forgot where I was, I started doing this every time. If you're running these on a remote server, same idea: pick a directory, stick with it.
How the API works: create, poll, download
Before we start firing off commands, one thing worth knowing. The API doesn't return an image file directly. It works asynchronously: you submit a capture request, get back JSON with an ID and a pending status, then poll (keep asking "is it done yet?" in a loop) until the status flips to completed, then download the file. Three separate HTTP calls. Processing usually takes a few seconds depending on page complexity. Simple static pages finish quickly. Heavy SPAs with lots of JavaScript take longer.
Step one, create the screenshot:
curl -s "https://api.screenshotrun.com/v1/screenshots/capture?url=https://github.com&format=png" \
  -H "Authorization: Bearer $SCREENSHOTRUN_KEY"
You'll get JSON back with an id field. Grab that ID and check the status:
curl -s -H "Authorization: Bearer $SCREENSHOTRUN_KEY" \
  "https://api.screenshotrun.com/v1/screenshots/SCREENSHOT_ID"
Once status says completed, download the actual image. Notice the /image at the end of the URL:
curl -s -H "Authorization: Bearer $SCREENSHOTRUN_KEY" \
  "https://api.screenshotrun.com/v1/screenshots/SCREENSHOT_ID/image" \
  -o screenshot.png
Only this third command saves a file to disk. The first two deal with JSON.
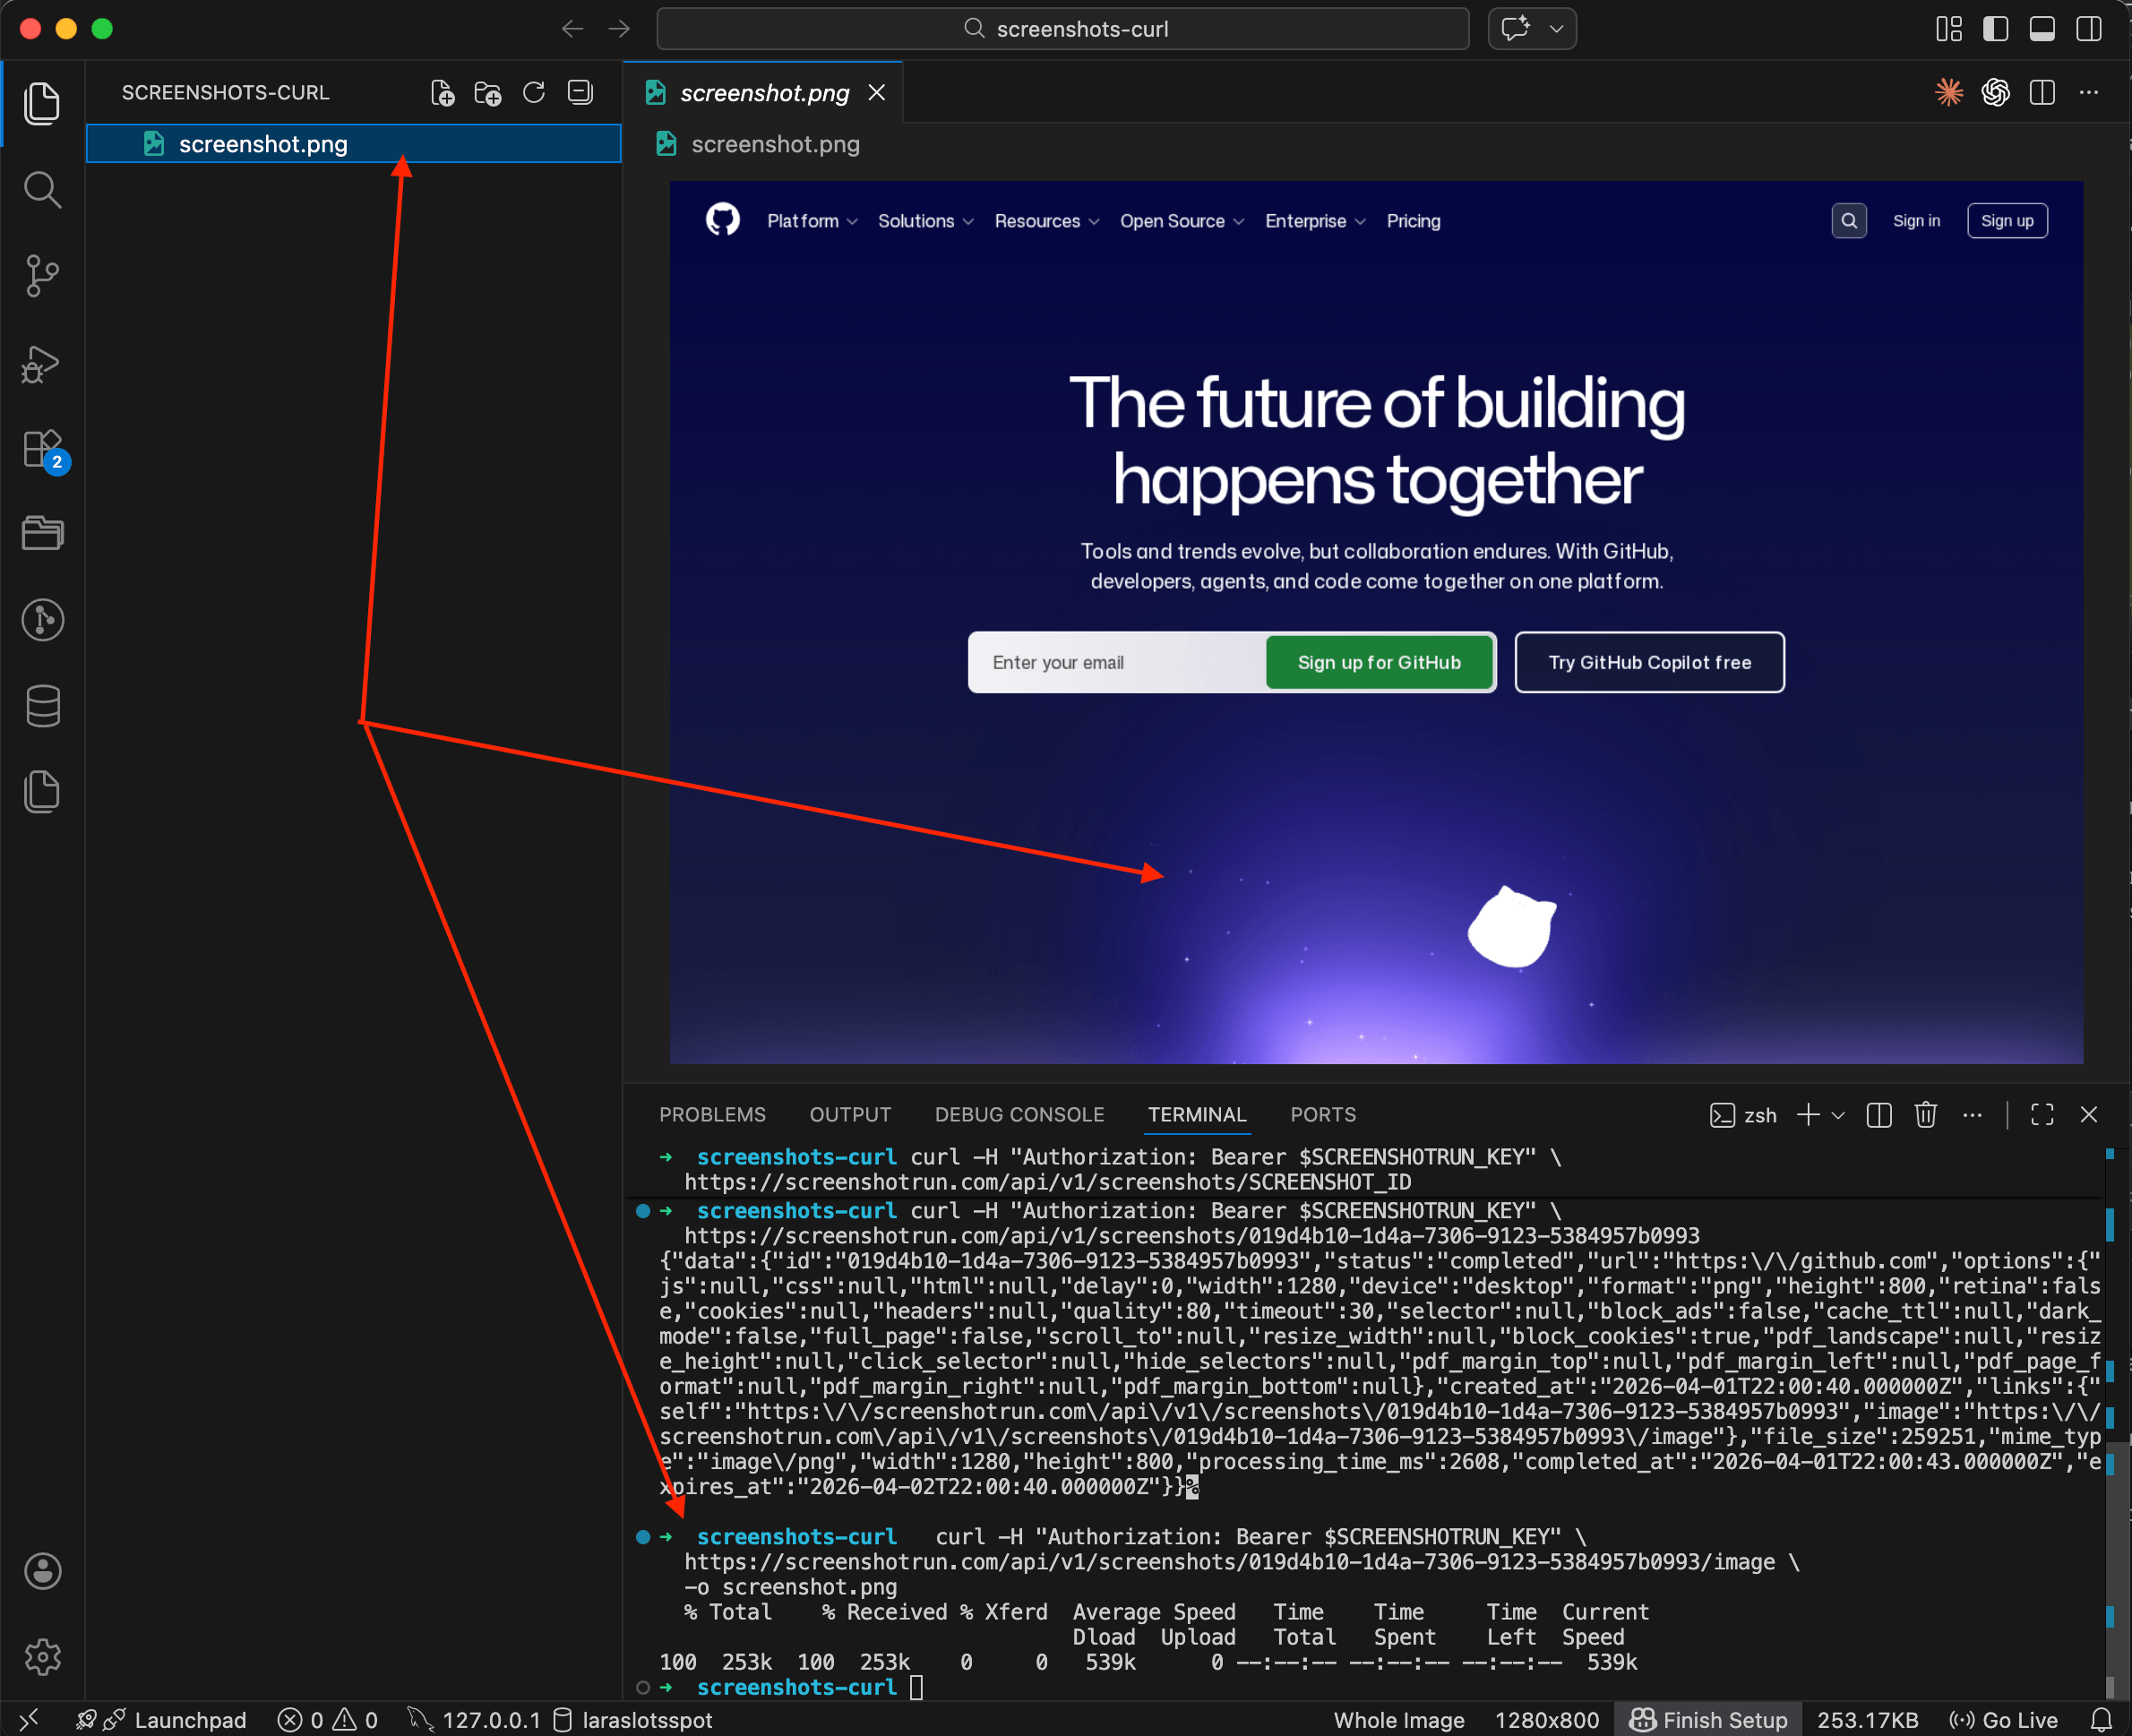
Three commands, three purposes. If that feels tedious for quick one-off captures, skip ahead to the all-in-one bash screenshot script at the bottom that chains everything into a single run. Or if you'd rather skip polling entirely, the API supports webhooks that POST the result to your endpoint when the capture finishes.
Full-page screenshot
Most pages scroll well beyond what fits in a 1280x800 viewport. GitHub's trending page, for example, extends several thousand pixels. Add full_page=true and the API scrolls the entire document, then stitches the result into one tall image:
curl -s "https://api.screenshotrun.com/v1/screenshots/capture?url=https://github.com/trending&format=png&full_page=true" \
  -H "Authorization: Bearer $SCREENSHOTRUN_KEY"
I use this constantly for archiving landing pages and checking how long-form articles render end to end. One gotcha: if the page lazy-loads images below the fold, add &delay=3 to give them time to trigger. The renderer scrolls the page to force lazy content to load, but some sites need an extra beat. Full-page screenshots of complex pages can produce very large PNG files, so pair it with WebP if file size matters. More details on how this works in the full-page screenshot feature docs.
Mobile screenshot
Switch to a phone viewport with device=mobile:
curl -s "https://api.screenshotrun.com/v1/screenshots/capture?url=https://stripe.com&format=png&device=mobile" \
  -H "Authorization: Bearer $SCREENSHOTRUN_KEY"
Three presets: desktop (1280x800, the default), tablet, and mobile. Each one sets the viewport size and sends the matching user-agent string, so the site actually serves its responsive layout instead of squishing the desktop version into a narrow frame. I ran into this with a client's site once: the mobile capture looked like a compressed desktop page because the server was sniffing the user-agent to decide which CSS to serve. The device parameter handles that.
Need a specific device? Set width and height directly:
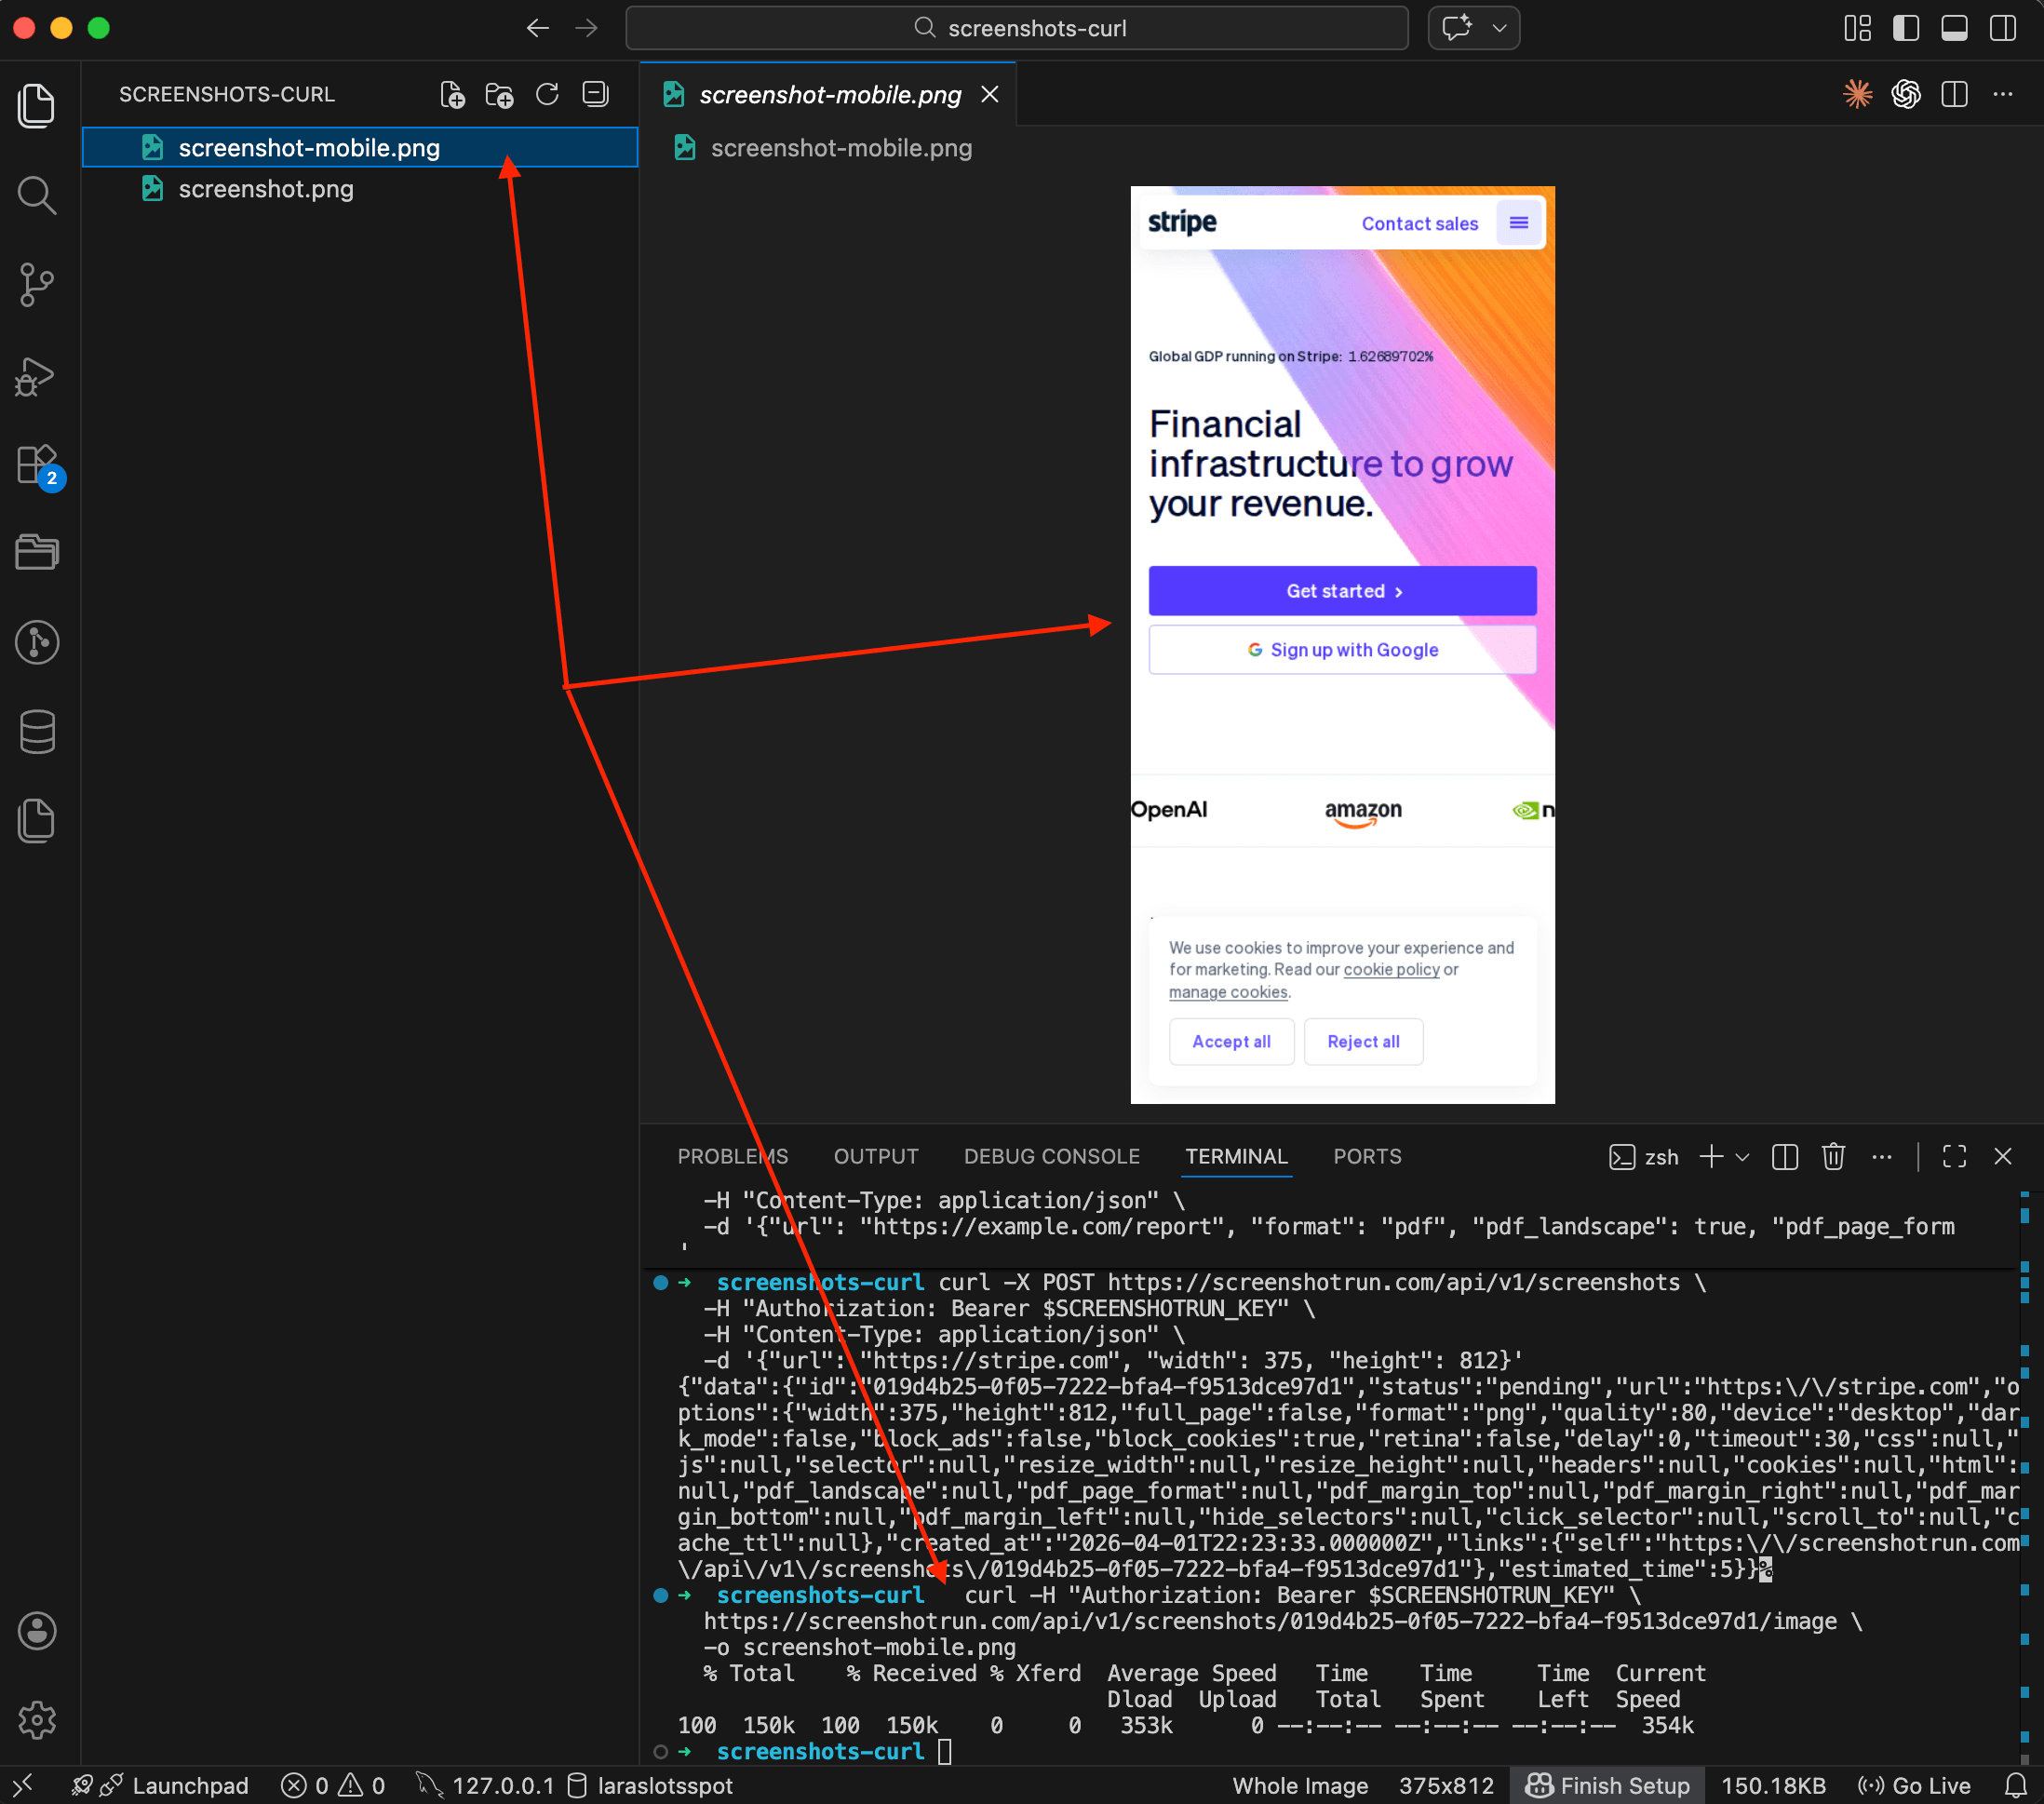
curl -s "https://api.screenshotrun.com/v1/screenshots/capture?url=https://stripe.com&format=png&width=375&height=812" \
  -H "Authorization: Bearer $SCREENSHOTRUN_KEY"
That's an iPhone X viewport. The viewport is 1280x800 by default because that's the most common desktop resolution across our users' analytics, but for mobile QA you'll want to match whatever device your designers are targeting.
Dark mode
Sites that support prefers-color-scheme: dark in their CSS will respond to this parameter:
curl -s "https://api.screenshotrun.com/v1/screenshots/capture?url=https://github.com&format=png&dark_mode=true" \
  -H "Authorization: Bearer $SCREENSHOTRUN_KEY"
Not every site respects this. GitHub does, MDN does, Tailwind CSS docs do. Most marketing pages don't bother because they haven't implemented dark mode CSS yet. When it works, you get the real dark theme with no browser extensions or workarounds. I prefer dark mode captures for OG images because they pop more in social feeds against the white backgrounds of Twitter and LinkedIn. If you're capturing both light and dark variants, that's two credits per URL, so factor that into your batch calculations. The full breakdown is on the dark mode feature page.
WebP and JPEG
PNG is the default. Lossless, pixel-perfect, and large. For thumbnails, previews, or anything where file size matters more than exact color reproduction, switch to WebP:
curl -s "https://api.screenshotrun.com/v1/screenshots/capture?url=https://example.com&format=webp&quality=70" \
  -H "Authorization: Bearer $SCREENSHOTRUN_KEY"
At quality 70, WebP files come out 60-70% smaller than the equivalent PNG with barely any visible difference. I usually land between 70 and 80. Below 60 you start seeing compression artifacts around text. JPEG works the same way:
curl -s "https://api.screenshotrun.com/v1/screenshots/capture?url=https://example.com&format=jpeg&quality=75" \
  -H "Authorization: Bearer $SCREENSHOTRUN_KEY"
If you're building bulk capture pipelines or link directories, WebP is the obvious pick. Smaller payloads, faster page loads for your users. More on format choices and when AVIF makes sense in the image format docs.
Thumbnails
Capture at full resolution, then let the API resize server-side. No reason to download a 1280px image just to shrink it in your app:
curl -s "https://api.screenshotrun.com/v1/screenshots/capture?url=https://example.com&format=webp&resize_width=320" \
  -H "Authorization: Bearer $SCREENSHOTRUN_KEY"
Aspect ratio is preserved automatically. You can set resize_height too, and the image fits within those bounds without stretching. Combine with quality=70 and a 320px WebP thumbnail comes out under 15 KB, which is small enough to inline as a data URI if you wanted to. I covered the full thumbnail workflow, including how to store and serve them at scale, in adding preview thumbnails to link directories. If you need thumbnails for hundreds of sites at once, a batch approach works better than running these one at a time.
Save as PDF
Swap format=pdf and you get a paginated document instead of an image:
curl -s "https://api.screenshotrun.com/v1/screenshots/capture?url=https://example.com/report&format=pdf&pdf_landscape=true&pdf_page_format=A4" \
  -H "Authorization: Bearer $SCREENSHOTRUN_KEY"
Custom margins work too:
curl -s "https://api.screenshotrun.com/v1/screenshots/capture?url=https://example.com/invoice&format=pdf&pdf_page_format=Letter&pdf_margin_top=20mm&pdf_margin_bottom=20mm&pdf_margin_left=15mm&pdf_margin_right=15mm" \
  -H "Authorization: Bearer $SCREENSHOTRUN_KEY"
PDF export renders differently from PNG because it uses Chrome's print pipeline, not the screen pipeline. Your CSS @media print rules apply, which means some layouts shift. Worth checking with a test capture before you wire it into production. Honestly, I use this more than I expected: archiving quarterly reports, saving documentation pages for offline reading, generating invoices from HTML templates. Page breaks follow Chrome's print layout engine, so what you see in Chrome's print preview is roughly what you get. The website-to-PDF feature page covers all the options.
Hide cookie banners
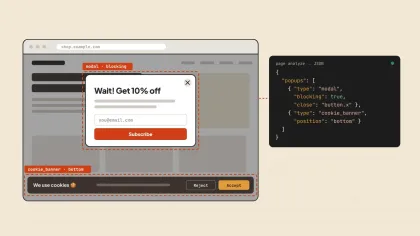
Cookie consent banners ruin screenshots. European sites are the worst offenders, with multi-step consent flows sometimes nested inside iframes. There are three ways to deal with them.
The simplest: block_cookies=true (enabled by default). The API's auto-blocker handles most common consent frameworks:
curl -s "https://api.screenshotrun.com/v1/screenshots/capture?url=https://bbc.com&format=png&block_cookies=true" \
  -H "Authorization: Bearer $SCREENSHOTRUN_KEY"
For stubborn custom banners the auto-blocker misses, target specific elements with hide_selectors:
curl -s "https://api.screenshotrun.com/v1/screenshots/capture?url=https://example.com&format=png&hide_selectors[]=%23cookie-banner&hide_selectors[]=.newsletter-popup" \
  -H "Authorization: Bearer $SCREENSHOTRUN_KEY"
Or if the banner has an "Accept" button, click it before the capture fires:
curl -s "https://api.screenshotrun.com/v1/screenshots/capture?url=https://example.com&format=png&click_selector=%23accept-cookies" \
  -H "Authorization: Bearer $SCREENSHOTRUN_KEY"
If a site blocks headless browsers entirely, add stealth=true to enable bot evasion patches.
Getting cookie blocking right was one of those tasks I kept underestimating. The cookie blocking feature uses the Fanboy Cookie Monster filter list under the hood, but there's always some site with a custom consent modal that slips through. I wrote up the full three-layer approach (network blocking, CSS injection, and click-accept fallback) in a separate post on hiding consent overlays, ad scripts, and chat pop-ups from screenshots.
CSS injection
Need to tweak the page before capturing? Inject CSS directly with the css parameter:
curl -s "https://api.screenshotrun.com/v1/screenshots/capture?url=https://example.com&format=png&css=header%7Bdisplay%3Anone%21important%7D%20.sidebar%7Bdisplay%3Anone%21important%7D" \
  -H "Authorization: Bearer $SCREENSHOTRUN_KEY"
URL-encoding CSS in query strings gets ugly fast. For anything more than a one-liner, drop the CSS into a variable first:
CSS=$(python3 -c "import urllib.parse, sys; print(urllib.parse.quote(sys.argv[1], safe=''))" "header { display: none !important; } .sidebar { display: none !important; } body { background: #ffffff; }")

curl -s "https://api.screenshotrun.com/v1/screenshots/capture?url=https://example.com&format=png&css=$CSS" \
  -H "Authorization: Bearer $SCREENSHOTRUN_KEY"
I mostly reach for this when taking documentation screenshots: strip the nav, sidebars, and footer so only the main content remains. Clean captures without asking anyone to change the actual page. The injected CSS runs right before the capture fires, so !important overrides whatever the page has. You can also use it to force a white background for consistency across captures, or bump up font sizes for more readable screenshots at smaller viewport widths.
Render raw HTML
You don't always need a live URL. Pass raw HTML and the API renders it directly:
HTML=$(python3 -c "import urllib.parse, sys; print(urllib.parse.quote(sys.argv[1], safe=''))" '<html><body style="padding:40px;font-family:sans-serif;background:#1a1a2e;color:#eee"><h1>Monthly Report</h1><p>Generated on October 11, 2026</p></body></html>')

curl -s "https://api.screenshotrun.com/v1/screenshots/capture?html=$HTML&format=png&width=800&height=400" \
  -H "Authorization: Bearer $SCREENSHOTRUN_KEY"
That's how I build dynamic OG images: create an HTML template, inject data from a database or API, render the result to an image. The html parameter accepts up to 500,000 characters, so fairly complex templates with inline SVGs and embedded fonts work fine. The full OG image workflow is covered in generating OG images with a screenshot API. Chrome on Linux renders fonts differently from macOS, though. Helvetica falls back to Liberation Sans, so stick to Google Fonts or embed your typefaces if exact rendering matters.
Retina captures with bash
The first time I enabled retina on a full-page capture, the output file was 12 MB. Both width and height double at 2x, so the file size quadruples, not doubles. That surprise alone is worth knowing before you wire retina into a batch pipeline. The parameter itself is simple:
curl -s "https://api.screenshotrun.com/v1/screenshots/capture?url=https://example.com&format=webp&retina=true" \
  -H "Authorization: Bearer $SCREENSHOTRUN_KEY"
A 1280x800 viewport produces a 2560x1600 image. Text and vector graphics come out noticeably sharper on high-DPI displays. That's why I always pair retina with WebP. Retina WebP at quality 75 keeps it under 2 MB for most sites, which is actually manageable. Use retina when the screenshot will be displayed large on a page or printed. For thumbnails and monitoring dashboards, 1x is plenty.
Caching to save credits
Last week I had a cron job checking a client's pricing page every 15 minutes. After two days I realized the page hadn't changed once, but I'd burned through 192 credits on identical captures. That's when I added cache_ttl:
curl -s "https://api.screenshotrun.com/v1/screenshots/capture?url=https://example.com&format=png&cache_ttl=3600" \
  -H "Authorization: Bearer $SCREENSHOTRUN_KEY"
The value is in seconds. 3600 means one hour. This tells the API: "if you already captured this exact URL with these exact parameters in the last hour, return the cached result." No new render, no credit spent. For monitoring setups where you check every 15 minutes but the page only changes once a day, caching cuts your credit usage dramatically. I use cache_ttl=86400 (24 hours) for static marketing pages and cache_ttl=300 (5 minutes) for dashboards that update throughout the day. I wrote a deeper dive on screenshot caching strategies that covers cache key composition and TTL selection for different use cases.
All-in-one bash screenshot script
Running three separate cURL commands for every capture gets old quickly. I wrapped everything into one script — create, poll, download — with error handling and a timeout:
#!/bin/bash
set -euo pipefail

URL="${1:?Usage: ./screenshot.sh  [output-file]}"
OUTPUT="${2:-screenshot.webp}"
KEY="${SCREENSHOTRUN_KEY:?Set SCREENSHOTRUN_KEY environment variable}"
API="https://api.screenshotrun.com/v1"
TIMEOUT=60
ELAPSED=0

# URL-encode the target
ENCODED_URL=$(python3 -c "import urllib.parse, sys; print(urllib.parse.quote(sys.argv[1], safe=''))" "$URL")

# Create the screenshot
RESPONSE=$(curl -s "$API/screenshots/capture?url=$ENCODED_URL&format=webp&full_page=true" \
  -H "Authorization: Bearer $KEY")

ID=$(echo "$RESPONSE" | grep -o '"id":"[^"]*"' | head -1 | cut -d'"' -f4)

if [ -z "$ID" ]; then
  echo "Error: Failed to create screenshot"
  echo "$RESPONSE"
  exit 1
fi

echo "Screenshot ID: $ID"

# Poll until ready or timeout
while [ $ELAPSED -lt $TIMEOUT ]; do
  STATUS=$(curl -s -H "Authorization: Bearer $KEY" "$API/screenshots/$ID" \
    | grep -o '"status":"[^"]*"' | head -1 | cut -d'"' -f4)

  echo "Status: $STATUS (${ELAPSED}s)"

  if [ "$STATUS" = "completed" ]; then
    curl -s -H "Authorization: Bearer $KEY" \
      "$API/screenshots/$ID/image" -o "$OUTPUT"
    echo "Saved: $OUTPUT ($(du -h "$OUTPUT" | cut -f1))"
    exit 0
  fi

  if [ "$STATUS" = "failed" ]; then
    echo "Screenshot failed"
    exit 1
  fi

  sleep 2
  ELAPSED=$((ELAPSED + 2))
done

echo "Timed out after ${TIMEOUT}s"
exit 1
Save it as screenshot.sh, make it executable, and run:
chmod +x screenshot.sh
./screenshot.sh https://github.com github-home.webp
The set -euo pipefail at the top means the script exits immediately if anything fails, instead of silently continuing with empty variables. That alone has saved me from confused debugging sessions where $ID was empty and the script kept polling a blank URL. For more on handling API errors in production scripts, see the error handling guide.
If you're running captures in CI, you can call this script from GitHub Actions. I have a workflow that captures our marketing pages after every deploy and stores the screenshots as build artifacts. Takes a couple of minutes for 20 pages.
For batch processing across hundreds of URLs, you'd want to add rate limiting (the rate limiting strategies post covers the details) and parallelize with xargs -P 4 or GNU parallel. The bulk screenshots use case page has examples of that pattern.
Setting delay to 0, by the way, is not the same as omitting it entirely. Zero explicitly skips the auto-wait heuristics, which means the capture fires the instant the page load event triggers. For most static sites that's fine. For SPAs with client-side hydration, you'll end up with blank content below the fold. I don't have a reliable rule for which sites need a delay and which don't. Omitting the parameter lets the renderer decide, and that works for the vast majority of URLs in my experience.
Batch captures
When you need to automate screenshots for a list of URLs, xargs handles it in one line:
# Screenshot all URLs from a file, 4 in parallel
cat urls.txt | xargs -P 4 -I {} ./screenshot.sh {} screenshots/{}.webp
This runs four bash capture jobs at once, which is a good balance between speed and not hammering the API. For scaling to thousands of URLs with proper retry logic and progress tracking, see the bulk screenshots guide.
When to move beyond bash
At some point a bash screenshot script stops being the right tool. When you need structured error handling, retry logic with exponential backoff (gradually increasing wait times between retries), or parallel captures with progress tracking, switch to Python or Node.js. Bash is great for quick captures, cron jobs, and CI one-liners. For anything that needs to report failures to Slack or store results in a database, you'll want something with proper JSON parsing and HTTP error handling built in. But for the "SSH in, grab a screenshot, move on" workflow? I haven't found anything faster than a four-line bash function and a good API key.
FAQ#
The API uses an async workflow, so it takes three commands: one to create the screenshot, one to check the status, and one to download the image. You can wrap all three into a bash script that runs as a single command. A ready-to-use script is included in the article.
Export it as an environment variable: export SCREENSHOTRUN_KEY="sk_live_your_key_here". Add this line to your .bashrc or .zshrc to make it permanent. Then use $SCREENSHOTRUN_KEY in your cURL commands.
PNG (default), JPEG, WebP, and PDF. For smaller file sizes, use WebP with a quality setting of 70-80. For archiving or printing, use PDF with optional page format and margin parameters.
Add the device parameter set to "mobile" in your JSON payload. The API sets the right viewport size and user agent automatically, so the site renders its responsive mobile layout. You can also set custom width and height values for specific device dimensions.
The block_cookies parameter is on by default and handles most common consent dialogs. For stubborn banners, use hide_selectors with the CSS selectors of the elements you want removed. You can also use click_selector to click an "Accept" button before the capture fires.