
 Vitalii Holben
How to take a website screenshot with Java (Selenium & Playwright)
I kept putting off the Java tutorial because I expected mountains of boilerplate. Turns out Java's built-in HttpClient makes API calls almost as clean as Python's requests. Here are three ways to capture website screenshots with Java — Selenium, Playwright, and an API — with working code, honest comparison, and a Spring Boot integration example.
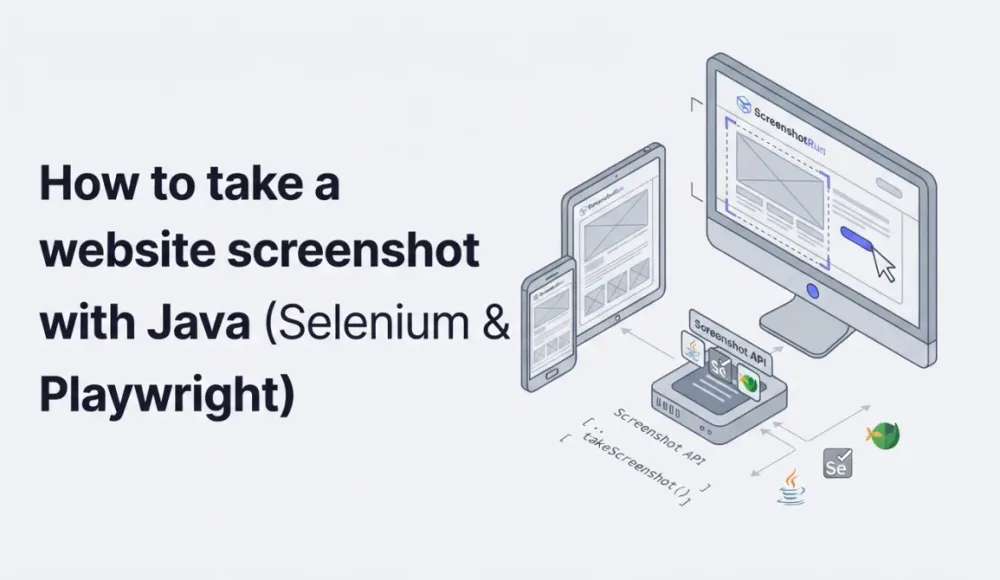
I've already written screenshot guides for Python, Node.js, PHP, Go, and cURL, but Java kept getting pushed to the bottom of the list. Not because it's hard. I just kept picturing piles of boilerplate and figured it would be tedious to put together. Turns out the built-in HttpClient from Java 11+ makes HTTP calls almost as clean as Python's requests, and I was surprised how little code the final version needed. If you already have a Spring Boot project running, adding screenshot capture is maybe a ten-minute job.
In this guide I'll walk through three ways to take website screenshots with Java: Selenium WebDriver, Playwright for Java, and a screenshot API. For each one I'll show you working code you can run right now, explain where the approach works best, and be upfront about the limitations you'll run into.
What you'll need before getting started
Every example in this guide requires Java 17 or higher and Maven. Check that they're installed:
java --version
mvn --version
Java 17 is the current LTS that most teams have already migrated to, so chances are you already have it. If you're still on Java 11, everything in this guide will work there too, except a couple of syntax shortcuts like List.of(). Let's start by creating a project:
mvn archetype:generate \
  -DgroupId=com.example.screenshots \
  -DartifactId=java-screenshots \
  -DarchetypeArtifactId=maven-archetype-quickstart \
  -DarchetypeVersion=1.5 \
  -DinteractiveMode=false

cd java-screenshots
This gives you a standard Maven project with a src/main/java folder and a pom.xml where we'll add dependencies as we go. Now let's move on to the actual screenshots.
Method 1: Selenium WebDriver, when it's already in your project
Selenium is the tool most Java developers already know from their UI testing days, and if it's already in your project, adding screenshots to existing code is literally a single method call. If you need full-page captures, though, Selenium falls short. It's a different story if you're installing Selenium from scratch just for screenshots. In that case, it's probably overkill. The amount of boilerplate you end up writing feels disproportionate for such a simple task.
Which dependencies to add to your pom.xml
<dependencies>
    <dependency>
        <groupId>org.seleniumhq.selenium</groupId>
        <artifactId>selenium-java</artifactId>
        <version>4.27.0</version>
    </dependency>
    <dependency>
        <groupId>io.github.bonigarcia</groupId>
        <artifactId>webdrivermanager</artifactId>
        <version>5.9.2</version>
    </dependency>
</dependencies>
With webdrivermanager, the right ChromeDriver binary gets downloaded automatically and keeps it in sync with your installed browser version. Without it, you'd have to manually track chromedriver releases and match versions every time Chrome updates, a chore that nobody enjoys and that regularly breaks CI pipelines.
How to take a basic screenshot with Selenium
Create a file called SeleniumScreenshot.java:
import org.openqa.selenium.OutputType;
import org.openqa.selenium.TakesScreenshot;
import org.openqa.selenium.WebDriver;
import org.openqa.selenium.chrome.ChromeDriver;
import org.openqa.selenium.chrome.ChromeOptions;
import io.github.bonigarcia.wdm.WebDriverManager;

import java.io.File;
import java.io.IOException;
import java.nio.file.Files;
import java.nio.file.Path;
import java.nio.file.StandardCopyOption;

public class SeleniumScreenshot {
    public static void main(String[] args) throws IOException {
        WebDriverManager.chromedriver().setup();

        ChromeOptions options = new ChromeOptions();
        options.addArguments("--headless=new");
        options.addArguments("--window-size=1280,800");

        WebDriver driver = new ChromeDriver(options);

        driver.get("https://dev.to");

        File screenshot = ((TakesScreenshot) driver).getScreenshotAs(OutputType.FILE);
        Files.copy(screenshot.toPath(), Path.of("dev_to.png"),
                StandardCopyOption.REPLACE_EXISTING);

        System.out.println("Saved: dev_to.png");
        driver.quit();
    }
}
Run it with:
mvn compile exec:java -Dexec.mainClass="com.example.screenshots.SeleniumScreenshot"Chrome starts in headless mode, loads dev.to, captures whatever fits in the 1280×800 viewport, and saves the result as a PNG file. That cast to TakesScreenshot looks, honestly, not very elegant. It's been there since Selenium 2, and after all these years nobody has redesigned the API into something cleaner. But it works reliably.
How to capture only a specific element on the page
Sometimes you don't need the entire page, just one particular block: a site header, a product card, a chart, or a form. Selenium can capture individual elements, and it's almost as straightforward:
import org.openqa.selenium.By;
import org.openqa.selenium.WebElement;

// ... same setup as above ...

driver.get("https://dev.to");

WebElement header = driver.findElement(By.tagName("header"));
File headerShot = header.getScreenshotAs(OutputType.FILE);
Files.copy(headerShot.toPath(), Path.of("dev_to_header.png"),
        StandardCopyOption.REPLACE_EXISTING);

System.out.println("Saved: dev_to_header.png");
driver.quit();
You get a neatly cropped image showing just the header: navigation, logo, search field, and nothing else. This works well when you need to capture a login form for documentation, a pricing table for a report, or any other specific block without the rest of the page getting in the way. If you want to go deeper into this, I wrote a separate guide on how to capture a specific element using a CSS selector.
Why Selenium isn't the right tool for full-page screenshots
Selenium has one notable limitation: it can't take full-page screenshots. The getScreenshotAs() method only captures the visible viewport, and everything below the fold simply doesn't make it into the image. There are hacky workarounds involving JavaScript scrolling and image stitching, but in practice they're fragile and not worth the time. If you need full-page captures, there's a much better tool for the job: Playwright.
Method 2: Playwright for Java, full-page screenshots and mobile emulation out of the box
Playwright is Microsoft's browser automation library, and its Java version is surprisingly well-made. For the screenshot task specifically, Playwright has one fundamental advantage over Selenium: full-page captures work out of the box with a single parameter, no hacks or stitching required.
How to add Playwright to a Maven project
<dependency>
    <groupId>com.microsoft.playwright</groupId>
    <artifactId>playwright</artifactId>
    <version>1.49.0</version>
</dependency>
After adding the dependency, you still need to download the browser itself, which is done with a single command:
mvn exec:java -e -D exec.mainClass=com.microsoft.playwright.CLI -D exec.args="install chromium"This downloads a Chromium binary weighing about 400 MB. It only happens once, but it's worth keeping in mind if you're building a Docker image, because that's 400 MB on top of your container.
A basic Playwright screenshot with noticeably less code
Create PlaywrightScreenshot.java:
import com.microsoft.playwright.*;

import java.nio.file.Paths;

public class PlaywrightScreenshot {
    public static void main(String[] args) {
        try (Playwright playwright = Playwright.create()) {
            Browser browser = playwright.chromium().launch();
            Page page = browser.newPage();

            page.setViewportSize(1280, 800);
            page.navigate("https://news.ycombinator.com");
            page.screenshot(new Page.ScreenshotOptions()
                    .setPath(Paths.get("hackernews.png")));

            System.out.println("Saved: hackernews.png");
        }
    }
}
Notice how much shorter this is compared to Selenium. No driver management, no clunky casting, no manual file copying. Playwright cleans up after itself through try-with-resources, so when the block ends, the browser shuts down automatically. But the real advantage of Playwright is still ahead.
Full-page screenshot, the main reason to choose Playwright over Selenium
This is what makes Playwright worth using instead of Selenium. One parameter, setFullPage(true), and you get a screenshot of the entire page from the very top to the very bottom:
page.navigate("https://news.ycombinator.com");
page.screenshot(new Page.ScreenshotOptions()
        .setPath(Paths.get("hackernews_full.png"))
        .setFullPage(true));

System.out.println("Full-page screenshot saved");
Playwright scrolls through the page on its own, waits for content, and assembles one tall image. For Hacker News the result comes out at around 3000 pixels tall, all 30 stories plus the footer with the search bar. Try doing the same thing in Selenium with one line of code. You can't.
How to emulate a mobile device for your screenshot
Playwright has a built-in device registry, so emulating a phone is something you can do without manually looking up viewport sizes and user agent strings:
try (Playwright playwright = Playwright.create()) {
    Browser browser = playwright.chromium().launch();

    BrowserContext context = browser.newContext(
            new Browser.NewContextOptions()
                    .setViewportSize(390, 844)
                    .setDeviceScaleFactor(3)
                    .setUserAgent("Mozilla/5.0 (iPhone; CPU iPhone OS 17_0 like Mac OS X)")
                    .setIsMobile(true)
    );

    Page page = context.newPage();
    page.navigate("https://news.ycombinator.com");
    page.screenshot(new Page.ScreenshotOptions()
            .setPath(Paths.get("hackernews_mobile.png")));

    System.out.println("Mobile screenshot saved");
}
Width 390 and height 844 match the iPhone 14 screen, and the setIsMobile(true) flag switches the browser into mobile mode where responsive styles kick in and touch events get enabled. The page looks exactly like it would on a real phone, and you don't need to hunt down viewport dimensions yourself. Playwright handles the device profile for you. For more viewport sizes of popular phones and tablets, check out my guide on mobile device screenshots.
How to wait for dynamic content to load before taking the screenshot
JavaScript-heavy pages have a common problem: the screenshot fires before the content has finished loading, and you end up with a half-empty page or a spinner instead of actual data. Playwright can wait for a specific element to appear:
page.navigate("https://github.com/trending");
page.waitForSelector("article.Box-row");
page.screenshot(new Page.ScreenshotOptions()
        .setPath(Paths.get("github_trending.png")));
With waitForSelector, Playwright pauses execution until the target element shows up in the DOM. Without this line you'd most likely get the page skeleton with an empty repository list. This kind of waiting is especially important for SPA applications and any pages that fetch data after the initial HTML load.
Wrapping Playwright in a Spring Boot endpoint
Most Java developers are building web applications, not standalone scripts. If your backend needs to serve screenshots on demand, you can wrap Playwright in a REST controller. The approach below spawns a browser per request, which is fine for low-to-moderate traffic.
import com.microsoft.playwright.*;
import org.springframework.http.*;
import org.springframework.web.bind.annotation.*;

@RestController
@RequestMapping("/api/screenshots")
public class ScreenshotController {

    @GetMapping("/capture")
    public ResponseEntity capture(
            @RequestParam String url,
            @RequestParam(defaultValue = "1280") int width,
            @RequestParam(defaultValue = "800") int height,
            @RequestParam(defaultValue = "false") boolean fullPage) {

        try (Playwright pw = Playwright.create();
             Browser browser = pw.chromium().launch(new BrowserType.LaunchOptions().setHeadless(true));
             Page page = browser.newPage()) {

            page.setViewportSize(width, height);
            page.navigate(url);
            page.waitForLoadState(LoadState.NETWORKIDLE);

            byte[] screenshot = page.screenshot(new Page.ScreenshotOptions()
                    .setFullPage(fullPage));

            return ResponseEntity.ok()
                    .contentType(MediaType.IMAGE_PNG)
                    .body(screenshot);
        }
    }
}
This works for internal tools and low-traffic endpoints. For higher volume or production services where you want to avoid running Chrome on your infrastructure, a dedicated Java screenshot API removes the browser dependency entirely and handles scaling on the provider side.
Selenium vs Playwright: which one fits your Java project
Both tools solve the same problem from different angles. Here is my take after using both in production Java code.
Selenium makes sense if it is already in your project for UI testing. Adding getScreenshotAs() to existing test code takes one line, and you get Chrome, Firefox, Safari, and Edge support. The downside: no full-page screenshots, dated API design, and that awkward TakesScreenshot cast that has been there since Selenium 2.
Starting from scratch? Go with Playwright. Full-page captures with setFullPage(true), built-in mobile device profiles, cleaner API with less boilerplate, and automatic resource cleanup through try-with-resources. The downside: 400 MB Chromium download, a few hundred megabytes of RAM per instance, and the Java SDK gets updates slightly behind the Node.js version.
If you want to skip browser management on your server entirely, an API is the cleanest option. For Spring Boot services, batch processing, or Lambda functions where installing Chrome is impractical, a screenshot API handles rendering externally. See our Java screenshot API integration guide for working HttpClient and OkHttp examples with Spring Boot.
Production gotchas I wish I'd known earlier
While putting this guide together, I learned a few things that are worth knowing upfront.
Your Java version determines which HTTP client you'll use. The java.net.http.HttpClient class was introduced in Java 11 as part of JEP 321, and if you're stuck on Java 8 for some reason, you'll need to use Apache HttpClient or OkHttp instead. Both work fine, but you'll end up writing noticeably more code.
Set timeouts before you need them, not after a request hangs. Rendering screenshots of heavy pages can take anywhere from 3 to 10 seconds, and a reasonable timeout on your HTTP client will save you from situations where a request hangs indefinitely:
HttpClient client = HttpClient.newBuilder()
        .connectTimeout(Duration.ofSeconds(10))
        .build();
Parallel browser instances burn through memory fast. If you're running ten Selenium or Playwright instances in parallel, expect 2-4 GB of RAM consumed by screenshots alone. With the API approach, your memory usage stays near zero because rendering happens on a remote server.
File format matters more than you'd think. PNG gives you pixel-perfect images with no compression artifacts, making it the best choice for screenshots where text readability matters. JPEG files are smaller but lossy, which is fine for thumbnails and previews where small details aren't as important. I wrote more about this in my post on screenshot caching strategies.
Cookie banners will ruin almost every screenshot you take of third-party sites. In Selenium and Playwright you can inject JavaScript to hide banners before capturing, but every site implements its banner differently and maintaining those scripts gets tedious. ScreenshotRun's API blocks common cookie consent dialogs automatically, without any extra code on your side.
If you only need a specific part of the page, target it with a CSS selector. Take a look at my guide on capturing a specific element by CSS selector. Both Playwright and the ScreenshotRun API support element-level captures rather than screenshotting the whole page.
I was genuinely surprised how clean modern Java screenshot code turned out. The HttpClient from Java 11+ and Playwright's try-with-resources pattern make what used to be a boilerplate nightmare into something almost pleasant to write.
Frequently Asked Questions
No. Selenium's getScreenshotAs() method only captures the visible viewport. Everything below the fold is cut off. There are workarounds involving JavaScript scrolling and image stitching, but they're fragile. For full-page captures in Java, use Playwright — it handles it natively with setFullPage(true).
Java 11 or higher. The java.net.http.HttpClient class was introduced as part of JEP 321 in Java 11. If you're still on Java 8, you'll need Apache HttpClient or OkHttp instead, which means more code but the same result.
Each Chromium instance consumes 200–400 MB. Running ten Selenium or Playwright instances in parallel means 2–4 GB of RAM just for the browsers. If memory is a concern, reuse a single browser instance for multiple pages or switch to an API-based approach where rendering happens on a remote server.
Playwright for Java lets you set viewport dimensions, device scale factor, user agent, and mobile mode when creating a browser context. For an iPhone 14, use width 390, height 844, scale factor 3, and setIsMobile(true). Selenium can set the viewport and user agent but doesn't have built-in device profiles.
If Selenium is already in your project for UI testing, stick with it — adding screenshots is a one-line change. For new projects, Playwright gives you more: full-page captures, cleaner API, built-in mobile profiles, and automatic resource cleanup. The trade-off is a 400 MB Chromium download and slightly slower SDK updates compared to the Node.js version.
Fix "Could Not Find Expected Browser (Chrome) Locally" in Puppeteer
Puppeteer cannot find Chrome? Fix the "could not find expected browser locally" error in Docker, CI/CD, serverless, monorepos, and local development.
Read more →
Fix Puppeteer "Browser Has Disconnected" Error (All Causes)
Read more →
Why Instagram Breaks Your Screenshots (And How to Fix It with Playwright)
Instagram shows two login popups, triggers React re-renders when you hide them wrong, and locks scrollHeight to the viewport. Three problems, three fixes for Playwright and Puppeteer.
Read more →